Avalonia(五)使用其他主题来写一个待办事项软件
作者:LuckyFish
前言
我们之前都是使用Avalonia自带的主题去写,感觉对于新手来说有点难(因为要好看的话得自己去写大量的风格跟自定义主题)。不过Avalonia的社区也有大量优秀的控件主题库。这次我们使用的是FluentAvalonia。
https://github.com/amwx/FluentAvalonia
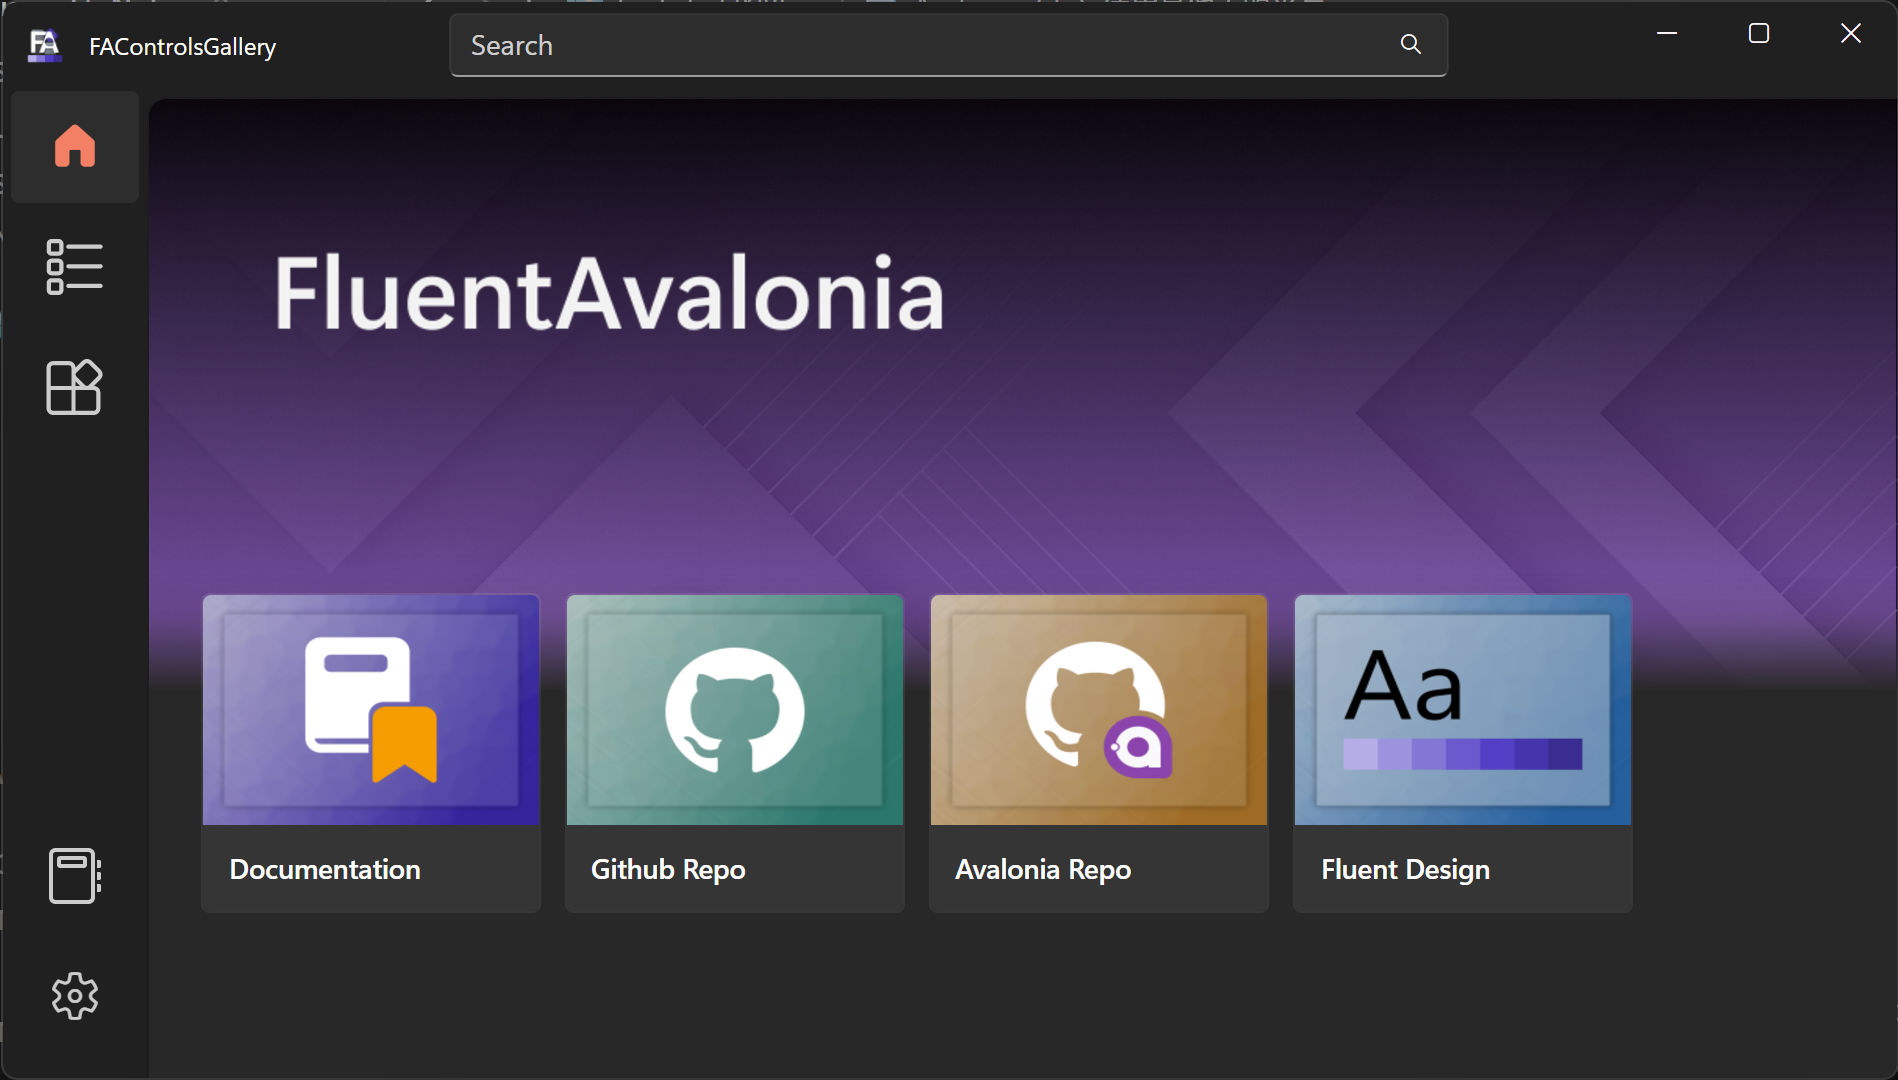
我个人还是比较喜欢这个控件主题库的。不过有个缺点就是图库资料有点少。
添加FluentAvalonia到项目中
我们需要将FluentAvalonia引用到项目中才可以使用:
从Nuget上下载
在终端上输入:
dotnet add package FluentAvaloniaUI --version 2.0.4或者在Rider跟VS上搜索:FluentAvaloniaUI

在App.axaml中引用主题
在App.axaml上删除Avalonia自带的主题,添加FluentAvalonia的主题:
<Application xmlns="https://github.com/avaloniaui"
             xmlns:x="http://schemas.microsoft.com/winfx/2006/xaml"
             x:Class="LearnTodo.App"
             xmlns:local="using:LearnTodo"
             xmlns:styling="clr-namespace:FluentAvalonia.Styling;assembly=FluentAvalonia"
             RequestedThemeVariant="Default">
             <!-- "Default" ThemeVariant follows system theme variant. "Dark" or "Light" are other available options. -->

    <Application.DataTemplates>
        <local:ViewLocator/>
    </Application.DataTemplates>

    <Application.Styles>
+       <styling:FluentAvaloniaTheme />
    </Application.Styles>
</Application>
现在我们可以简单尝试一下:
<Window xmlns="https://github.com/avaloniaui"
        xmlns:x="http://schemas.microsoft.com/winfx/2006/xaml"
        xmlns:vm="using:LearnTodo.ViewModels"
        xmlns:d="http://schemas.microsoft.com/expression/blend/2008"
        xmlns:mc="http://schemas.openxmlformats.org/markup-compatibility/2006"
        mc:Ignorable="d" d:DesignWidth="800" d:DesignHeight="450"
        x:Class="LearnTodo.Views.MainWindow"
        x:DataType="vm:MainWindowViewModel"
        Icon="/Assets/avalonia-logo.ico"
        Title="LearnTodo">

    <Design.DataContext>
        <vm:MainWindowViewModel/>
    </Design.DataContext>

    <TextBox HorizontalAlignment="Center" VerticalAlignment="Center" Text="1234"/>

</Window>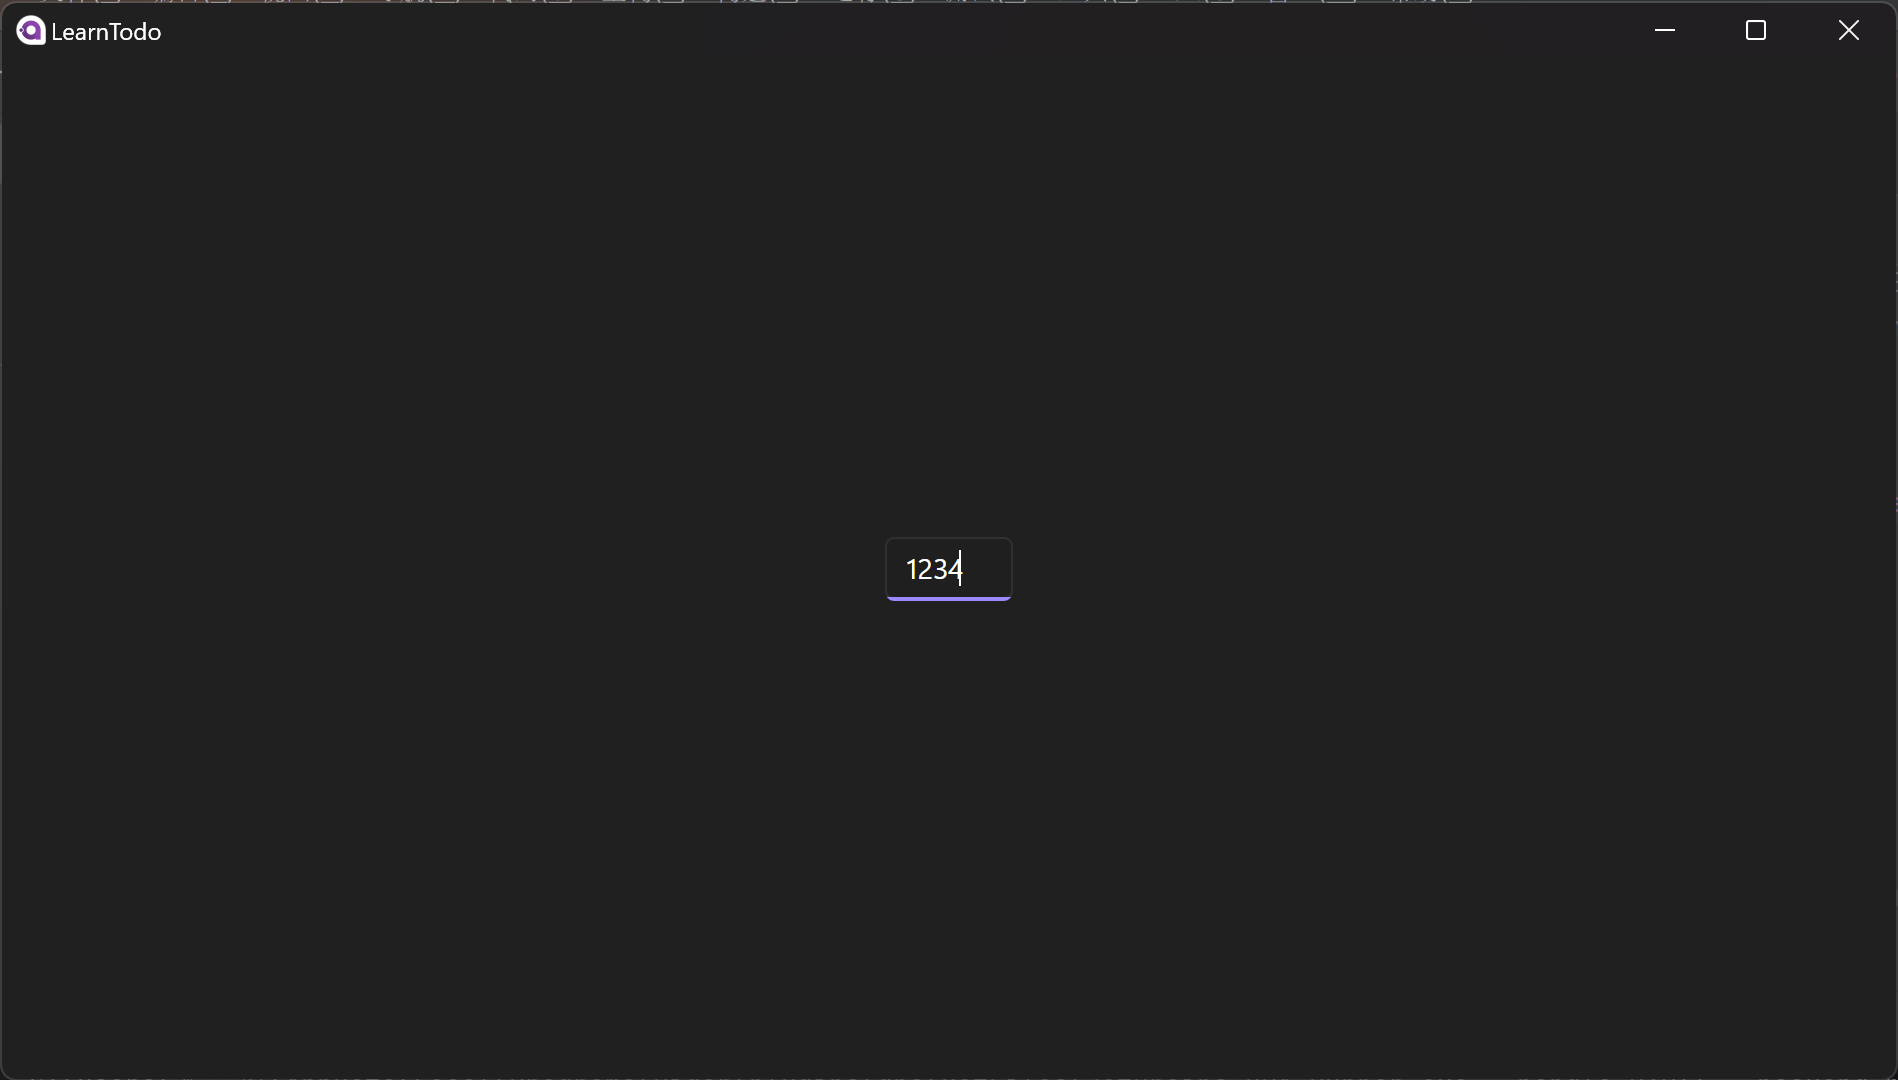
我们尝试写一个Todo应用
这次我们不打算写什么EF什么的,就只是单纯的写个软件。毕竟这是Avalonia教程,不是数据库教程。
不妨让我们先想想这个应用应该长什么样子:
- 有一个主页用来介绍软件
- 左边为待办列表,右边为待办详情
- 左边待办列表分为上中下:上层为返回框,中间是数据列表,下面是添加按钮
- 右边详情从上至下分别为:待办名称,时间,详情说明
那基本上就先这样
Model
这次因为只需要写一个TodoModel,所以代码非常简单:
public class TodoModel
{
    public string Name { get; set; }
    public DateTime End { get; set; }
    public string? Description { get; set; }
}
ViewModel
public class MainWindowViewModel : ViewModelBase
{
    public ObservableCollection<TodoModel> Todos { get; set; } = [];
}
View
我们按照上面的来的话,那么我们的代码就应该是这样的:
    <Grid ColumnDefinitions="Auto,*" Margin="10">
        <Grid Grid.Column="0" Width="100" RowDefinitions="Auto,*,Auto">
            <Button Grid.Row="0">
                <ui:SymbolIcon Symbol="Back"/>
            </Button>
            <ListBox Grid.Row="1" ItemsSource="{Binding Todos}">
                <ListBox.ItemTemplate>
                    <DataTemplate DataType="models:TodoModel">
                        <TextBlock Text="{Binding Name}"/>
                    </DataTemplate>
                </ListBox.ItemTemplate>
            </ListBox>
            <Button Grid.Row="2" Click="AddTodoClick" HorizontalAlignment="Stretch">
                <ui:SymbolIcon Symbol="Add"/>
            </Button>
        </Grid>
        <ui:Frame Grid.Column="1" Name="Frame"/>
    </Grid>
我们这里使用Frame来作为我们显示详情的控件。
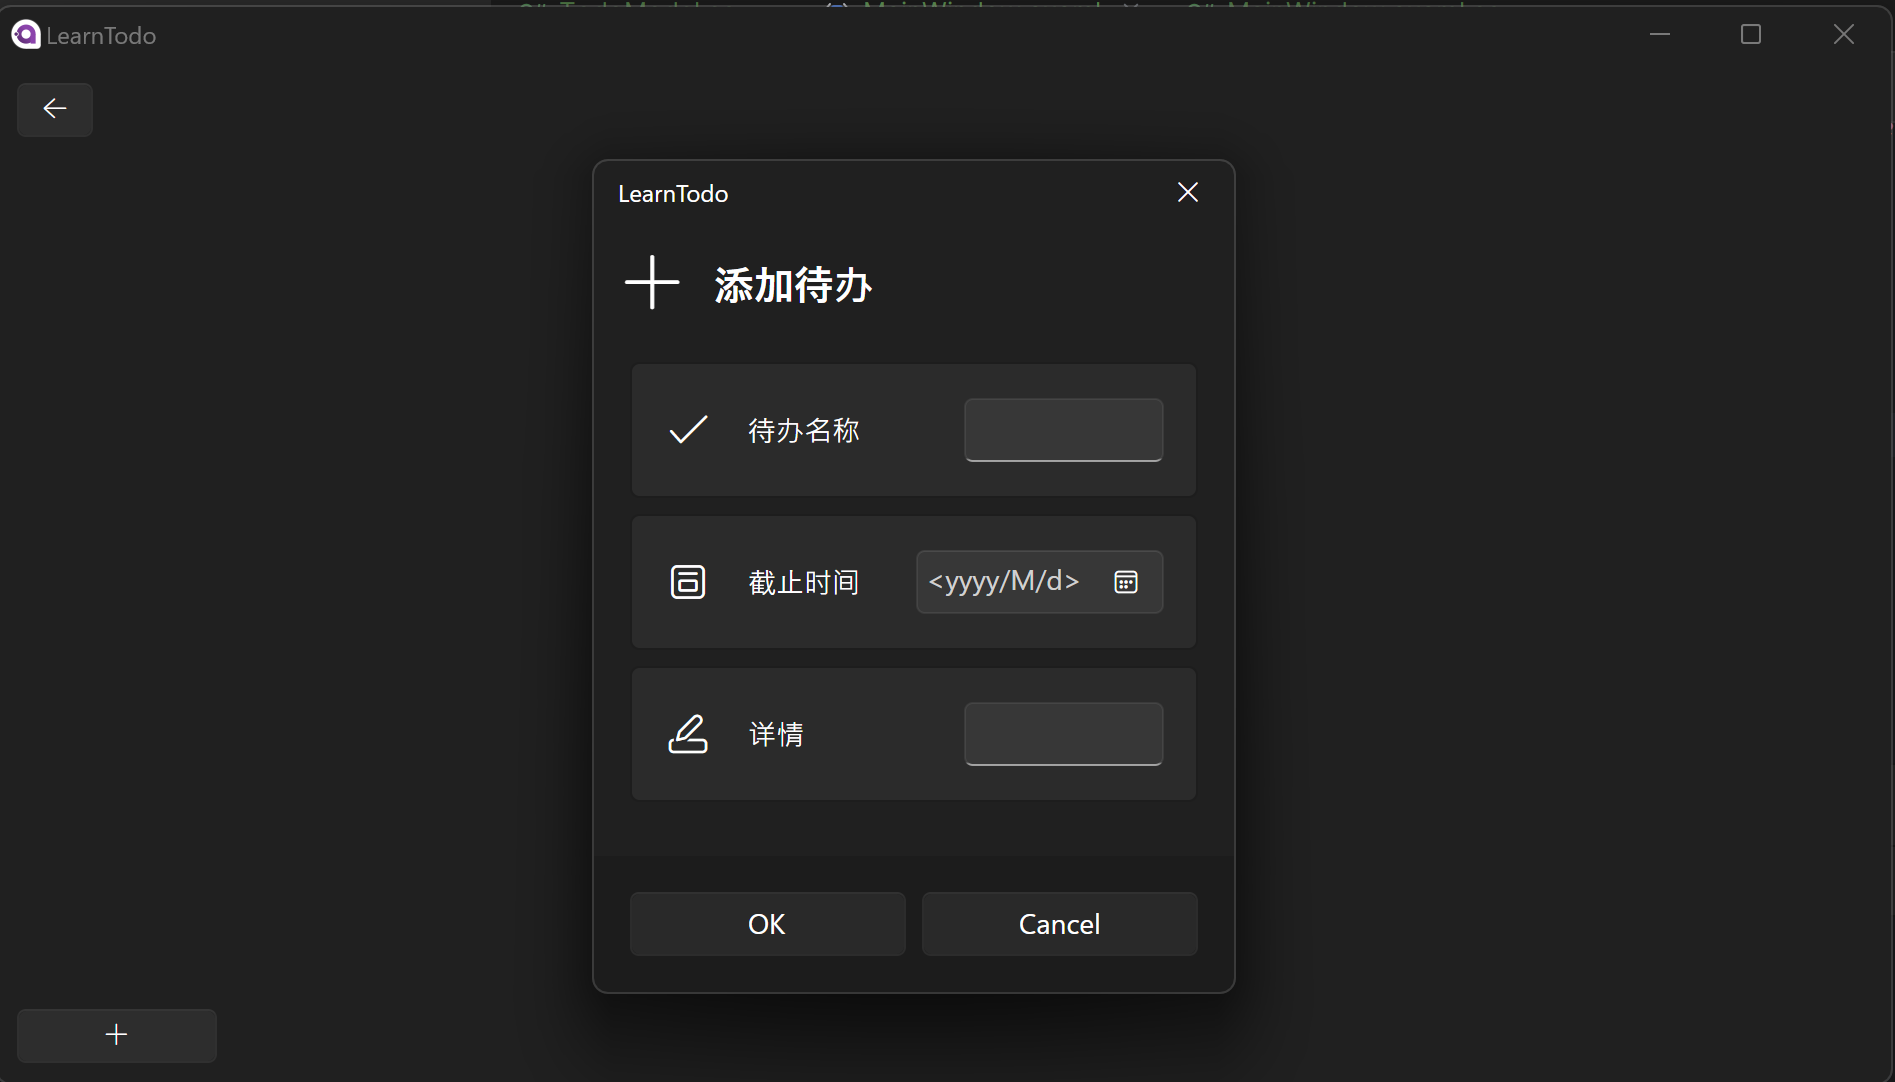
使用TaskDialog来添加待办
我们这里使用TaskDialog这个对话框容器来进行添加操作。
不过既然是容器,就得有相应的内容控件,这个是要我们自己写的。所以我们创建一个控件AddTodoDialog,代码如下:
    <StackPanel Spacing="8">
        <ui:SettingsExpander Header="待办名称"
                             IconSource="Accept">
            <ui:SettingsExpander.Footer>
                <TextBox Name="NameBox" Width="100"/>
            </ui:SettingsExpander.Footer>
        </ui:SettingsExpander>
        <ui:SettingsExpander Header="截止时间"
                             IconSource="CalendarDay">
            <ui:SettingsExpander.Footer>
                <CalendarDatePicker Name="Picker"/>
            </ui:SettingsExpander.Footer>
        </ui:SettingsExpander>
        <ui:SettingsExpander Header="详情"
                             IconSource="ColorLine">
            <ui:SettingsExpander.Footer>
                <TextBox Name="DescriptionBox" Width="100"/>
            </ui:SettingsExpander.Footer>
        </ui:SettingsExpander>
    </StackPanel>
然后在axaml.cs中添加一个方法:
    public TodoModel? Done()
    {
        if (string.IsNullOrEmpty(NameBox.Text) || Picker.SelectedDate == null) return default;
        return new TodoModel()
            { Name = NameBox.Text, End = Picker.SelectedDate.Value, Description = DescriptionBox.Text };
    }
同时在MainWindow中的按钮添加点击事件:
private async void AddTodoClick(object? sender, RoutedEventArgs e)
{
var td = new TaskDialog
{
Title = "LearnTodo",
Header = "添加待办",
IconSource = new SymbolIconSource(){Symbol = Symbol.Add},
Content = new AddTodoDialog(),
FooterVisibility = TaskDialogFooterVisibility.Never,
Buttons =
{
TaskDialogButton.OKButton,
TaskDialogButton.CancelButton
},
XamlRoot = (Visual)VisualRoot!
};
td.Closing += (dialog, args) =>
{
if ((TaskDialogStandardResult)args.Result != TaskDialogStandardResult.OK) return;
if (dialog.Content is not AddTodoDialog d) return;
var result = d.Done();
if (result == null)
{
args.Cancel = false;
return;
}
if (DataContext is not MainWindowViewModel model) return;
model.Todos.Add(result);
};
await td.ShowAsync();
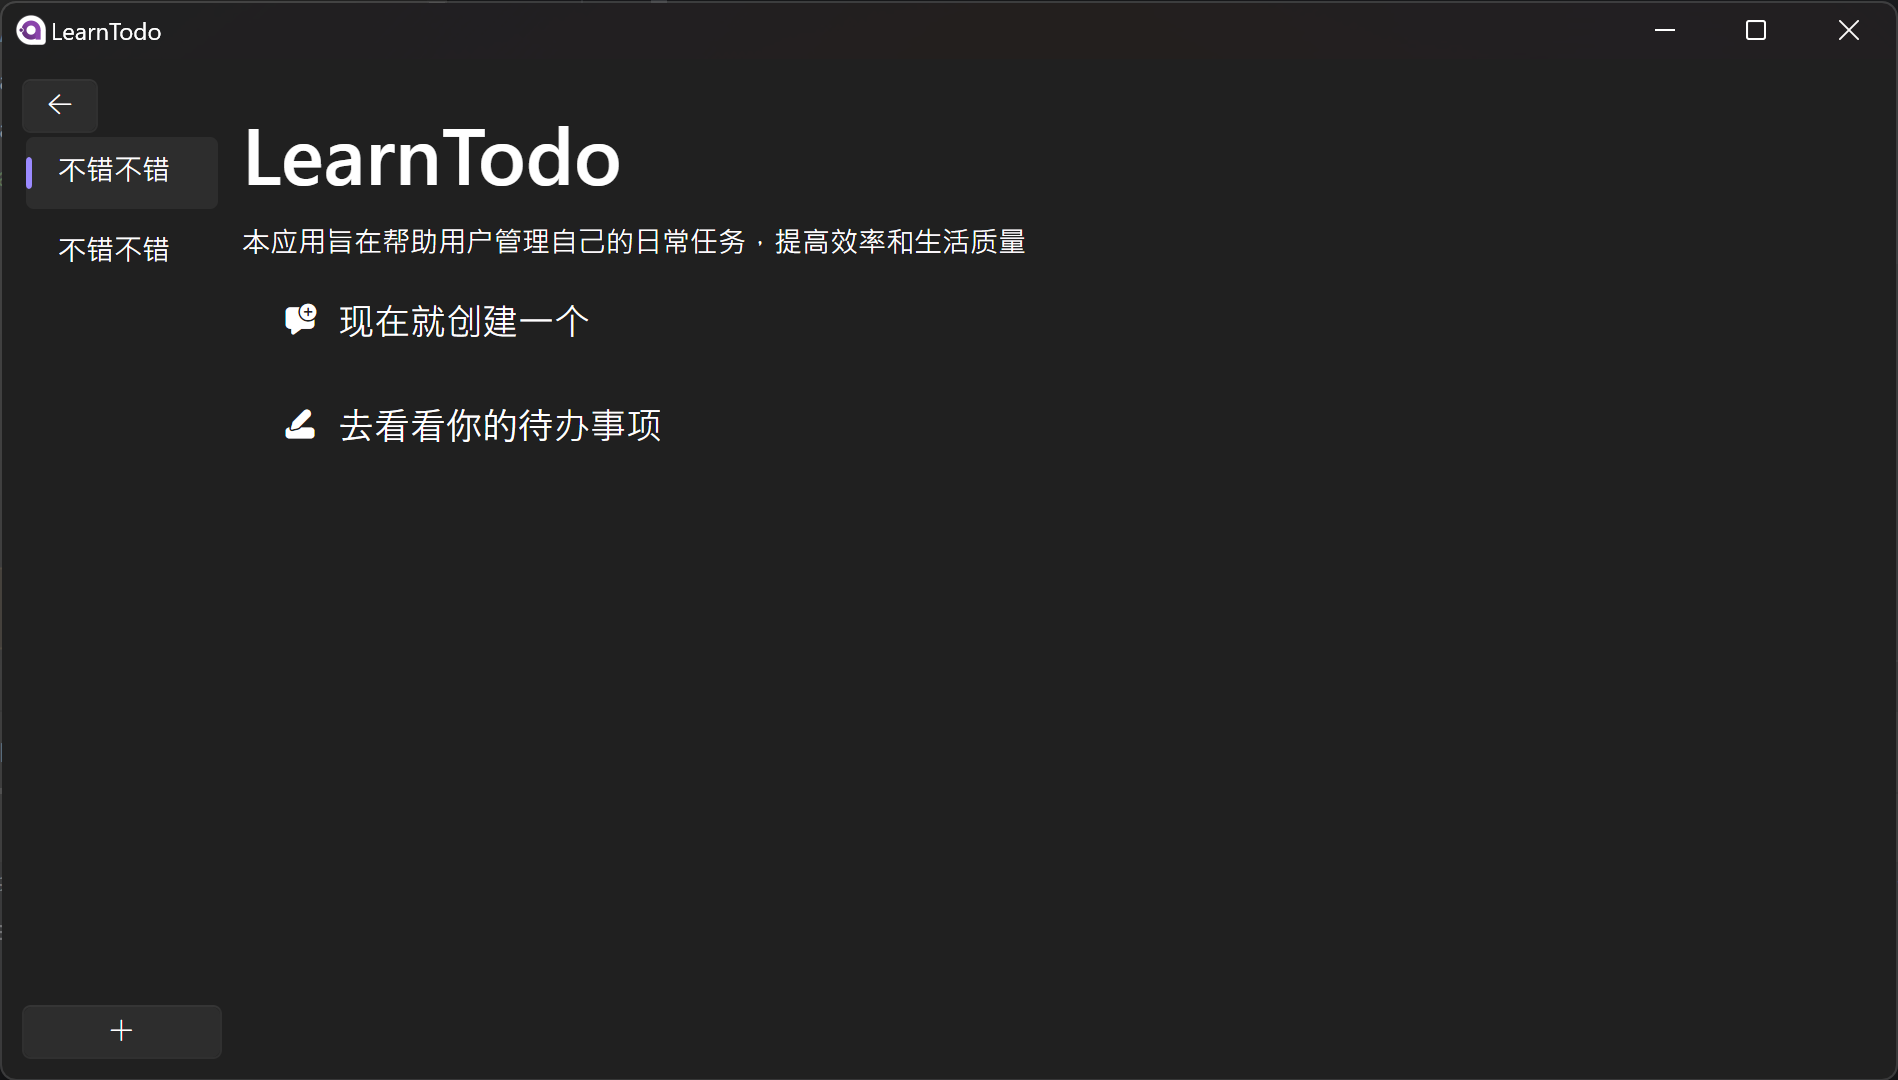
}现在可以看看效果:
使用Frame面板
要使用Frame,就得先写相关的控件:HomePage跟TodoPage:
HomePage
    <StackPanel Spacing="8" Margin="10">
        <TextBlock Theme="{DynamicResource TitleLargeTextBlockStyle}" Text="LearnTodo"/>
        <TextBlock Text="本应用旨在帮助用户管理自己的日常任务,提高效率和生活质量"/>
        <StackPanel.Styles>
            <Style Selector="WrapPanel:pointerover">
                <Setter Property="Background" Value="{DynamicResource CardBackgroundFillColorDefaultBrush}"/>
            </Style>
        </StackPanel.Styles>
        <WrapPanel Margin="10">
            <ui:SymbolIcon Margin="10,0" Symbol="CommentAddFilled" FontSize="18"/>
            <TextBlock Text="现在就创建一个" FontSize="18"/>
        </WrapPanel>
        <WrapPanel Margin="10">
            <ui:SymbolIcon Margin="10,0" Symbol="ColorLineFilled" FontSize="18"/>
            <TextBlock Text="去看看你的待办事项" FontSize="18"/>
        </WrapPanel>
    </StackPanel>
TodoPage
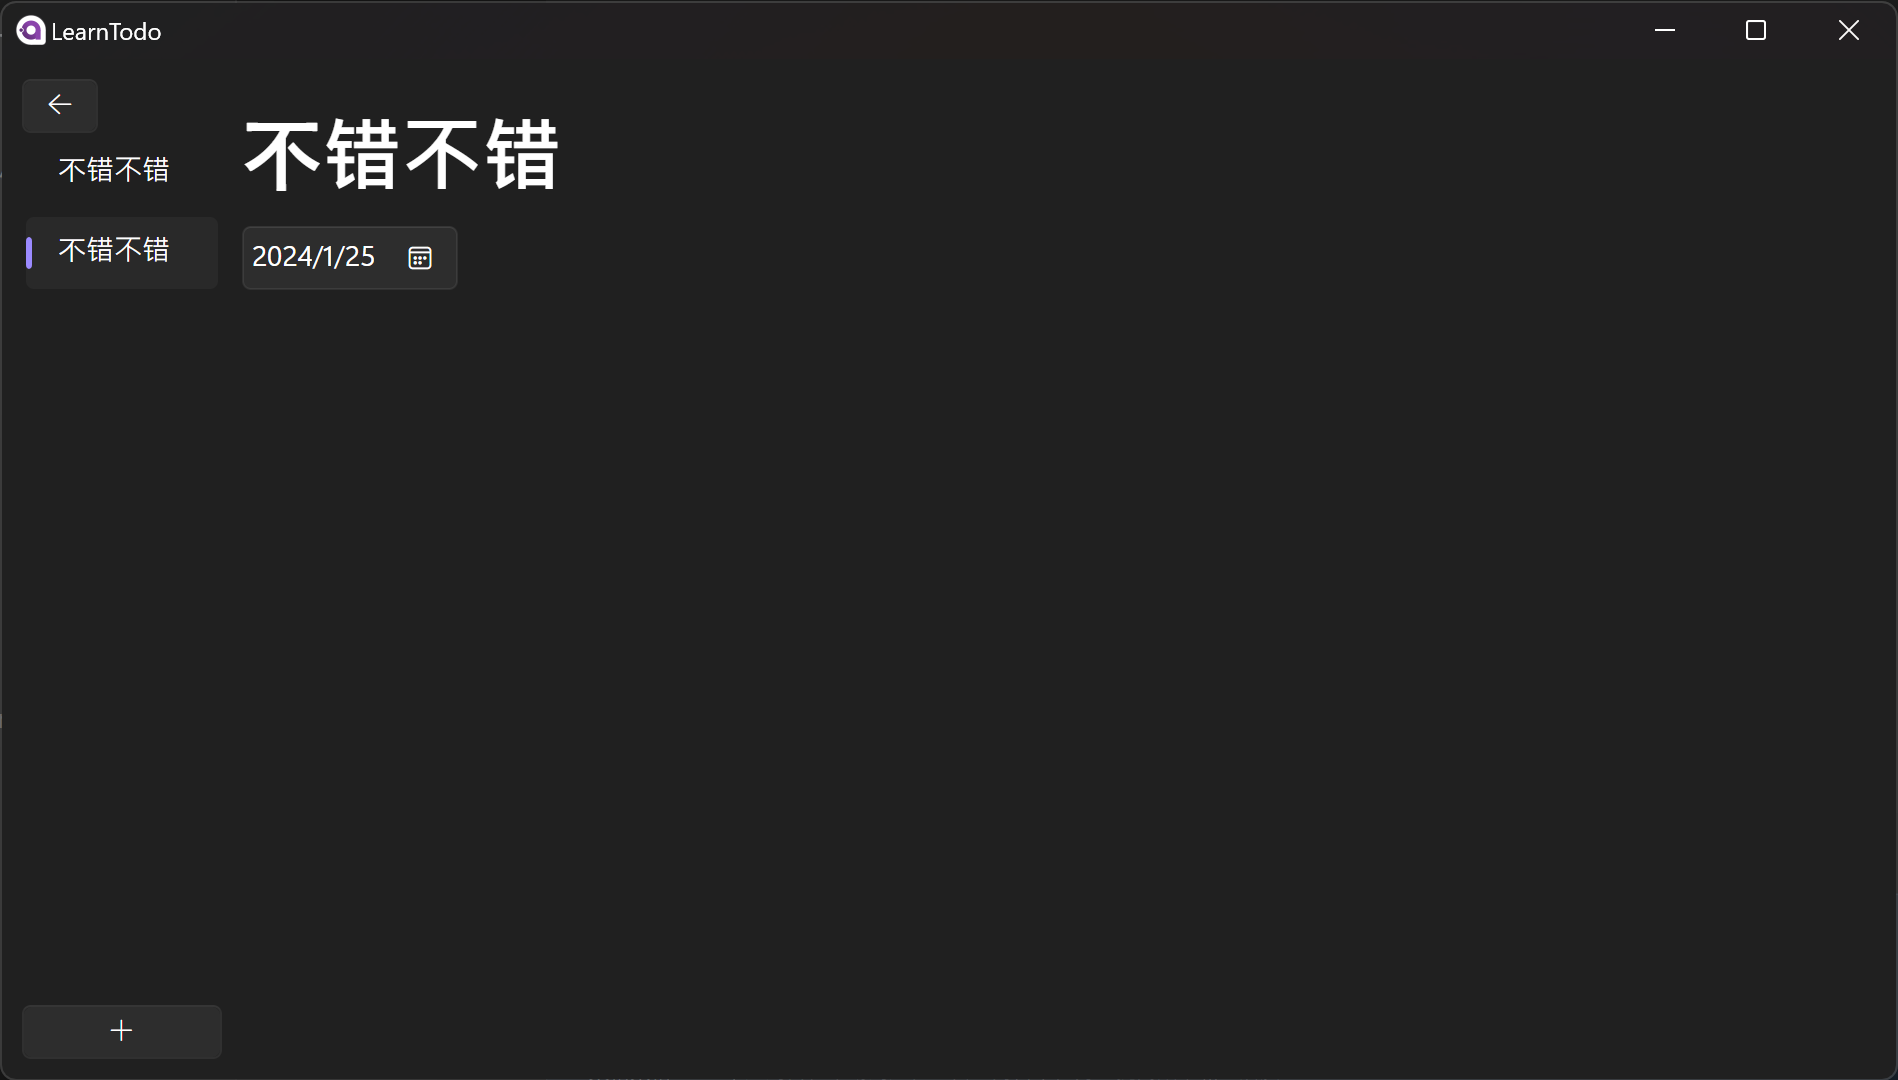
    <StackPanel Margin="10" Spacing="10">
        <TextBlock Theme="{DynamicResource TitleLargeTextBlockStyle}" Name="NameBlock"/>
        <CalendarDatePicker Name="Picker"/>
        <TextBlock Name="Block"/>
    </StackPanel>
对数据进行初始化:
public partial class TodoPage : UserControl
{
    public TodoPage(TodoModel model)
    {
        InitializeComponent();
        NameBlock.Text = model.Name;
        Picker.SelectedDate = model.End;
        Block.Text = model.Description;
    }
}
将数据接上Frame
我们现在已经把Page的内容写好了,那么现在我们就要去书写Frame的NavigationFactory:
这个NavigationFactory 就类似于数据模板
public class NavigationFactory : INavigationPageFactory
{
    public Control GetPage(Type srcType)
    {
        return new Border();
    }

    public Control GetPageFromObject(object target)
    {
        if (target.ToString() == "Home")
        {
            return new HomePage();
        }

        if (target is TodoModel model)
        {
            return new TodoPage(model);
        }
        throw new NotImplementedException();
    }
}
现在让我们把数据接上:
    public MainWindow()
    {
        InitializeComponent();
        Frame.IsNavigationStackEnabled = true;
        Frame.NavigationPageFactory = new NavigationFactory();
        Frame.NavigateFromObject("Home");
    }

    private void BackClick(object? sender, RoutedEventArgs e)
    {
        Frame.GoBack();
    }

    private void SelectionChanged(object? sender, SelectionChangedEventArgs e)
    {
        if(sender is not ListBox box)return;
        Frame.NavigateFromObject(box.SelectedValue);
    }
现在基本上已经搞定了,来看一下:
结尾
现在我们学会了使用主题写应用。
这个系列也先就到这里了,这篇文章主要是Avalonia入门教程,不过也基本上能写一些基本应用了。